Gluten free Dark Chocolate Avocado brownies 

I made the most delicious dark chocolate brownies yesterday. My family devoured them. They’re moist and gooey and you’d never know theit was no added sugar and that there were chia seeds and avocados in them. 


2 avocados

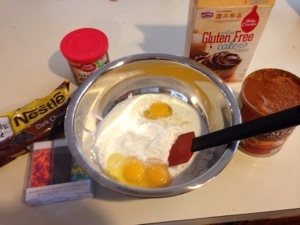
2 1/2 cups or 1 package of gluten free baking mix

1 cup butter softened or coconut oil

1/2 cup honey

1/2 cup palm sugar

1/2 cup dark chocolate cocoa 

1 cup chocolate chips 

1 teaspoon vanilla

chia gel **see directions

1 egg

1/4 cup milk I used cashew milk


I used my kitchen aid stand mixer. I put the avocados in first and mixed them until smooth. You could blend them in the blender. Then I added all the other ingredients except the chocolate chips and mixed them together.  I stirred in the chocolate chips. Put the whole mixture into a greased pan. Bake at 350 for about 40 minutes. 

If you wanted to make them with regular flour you would need 2 1/2 cups plus baking powder or baking soda. 

You could also use any sugar substitutes you wanted to. I like using honey and palm sugar. I also use maple syrup a lot for sweetening. 

**To make chia gel you put chia seeds in water and let it sit overnight. I put 1/4 cup of seeds in 1 cup of almond milk but you can use water. 

Minion handprint ornament

This year we decided to do something special for my sons Minion loving teacher for Christmas. My son was so excited about making these. He painted the snow himself. The only part I did myself was the eyes. I used paint for the whites of the eyes and a sharpie for the pupils and the glasses. I also wrote the year and his name on the back with a sharpie. This turned out so cute I think I’m going to have all of my kids do one of these for our tree!

/home/wpcom/public_html/wp-content/blogs.dir/fc3/60819355/files/2014/12/img_9679.jpg

/home/wpcom/public_html/wp-content/blogs.dir/fc3/60819355/files/2014/12/img_9690.jpg

/home/wpcom/public_html/wp-content/blogs.dir/fc3/60819355/files/2014/12/img_9689.jpg

Three headed snowman

I wanted to take a minute to show you what you can do when handprints go wrong. Here’s an ornament my four year old did for his preschool teacher. One of his fingers slid and he ended up with multiple impressions of the same finger but I just painted them up to blend in with the others and honestly I love it. To me it looks like a little snowman family mom, dad, & baby. I think little “mistakes” are sometimes what makes these kinds of gifts so precious.

/home/wpcom/public_html/wp-content/blogs.dir/7c5/30325270/files/2014/12/img_9687-0.jpg

Gluten Free Pumpkin Chocolate Chip Cake

When your a mom birthdays take on a completely different meaning. For one I just don’t care about getting older and I’m not really in the mood to celebrate me. It all sounds like an awful lot of work. I already throw parties for everyone else all year long, but the truth is kids love a party (and cake). It’s also good for kids to learn to give back to you the person who cares for them. So this year I took my 3 year old shopping with me on my birthday for cake ingredients and when my oldest got home from school we all baked a cake and they frosted and decorated it themselves. So it may not be the prettiest cake but it was special because we made it together.

20131102-154725.jpg

This cake is so easy and so delicious. I used one box of Betty Crocker gluten free cake mix and followed the directions on the box. I then added 1 can of pumpkin pie filling and one bag of chocolate chips. In the spirit of moms birthday I baked my cake in the mixing bowl (less dishes) for double the time called for on the box because the pumpkin adds a lot of volume and extra moisture to the batter. You just want to cook it until it’s firm.

When the cake was cool I flipped it onto a tray opened a can of frosting and set the kids loose.

20131102-155357.jpg

20131102-155418.jpg

Tis the Season for Mulled Wine

I love the fall and one of the things I love best about fall is a warm glass of mulled wine. Mulling wine is easy and a fun treat for any fall festivities. We usually make mulled wine on Thanksgiving or for Fall parties. This year we mulled some wine for the wet rainy walk on Halloween night trick or treating with our boys. I think we may have started a new tradition.

20131102-105635.jpg

Making mulled wine is easy. For each bottle of wine you mull you will need
1 large cinnamon stick
6-8 whole cloves
4-5 whole peppercorns
1 orange peel
1/4 cup of sugar
1/4 cup of vodka

The measurements can be adjusted to suit your taste. This is just a guideline that I go by. You start mulling by pouring your wine in a pot adding the spices and turning the burner on high. When your wine starts to simmer turn it down to a medium heat add your sugar. Let the wine simmer in the pot for 5-10 minutes. Turn off the heat and then add the vodka. Alcohol evaporates when it’s heated which is why we add the vodka at the end the vodka adds back in some of the alcohol that has evaporated from the wine. The more of a kick you want your mulled wine to have the more vodka you should add. If you want it a little sweeter or less sweet you can adjust the sugar to suit your taste.

I would recommend choosing a less expensive bottle of wine since mulling it changes it’s flavor anyway. I find the best mulling wines are ones that are a little on the sweet side already and that you already enjoy the flavor of. Traditionally mulled wines are usually red though I find a nice Catawba wine is really delicious mulled as well. This Halloween we used Bully Hills Banty Red to mull. So delicious and helped us keep warm on our wet walk through the neighborhood.

20131102-110943.jpg

Mickey Mouse Clubhouse Party

For my sons 5th birthday party he wanted a Mickey Mouse Clubhouse party. This year he was finally old enough to really help get ready and plan. He had the most fun picking out silly Mickey Mouse names for all the food. He laughed and laughed about “Donald’s Cheese and Quackers” and “Goofy’s Goof Juice”. He had fun painting styrofoam balls to make the Mickey Mouse head topiary centerpieces. He jumped for joy when we finally figured out how to make the basket for the glove balloon out of poster board and hot glue. It really was a joy to help him celebrate his big day.

20130916-214348.jpg

20130916-214421.jpg

20130916-214450.jpg

20130916-214524.jpg

20130916-214550.jpg

20130916-214615.jpg

20130916-214635.jpg

20130916-214702.jpg

20130916-214750.jpg

20130916-214833.jpg

20130916-214902.jpg

20130916-214936.jpg

20130916-214954.jpg

20130916-215033.jpg

20130916-215122.jpg

20130916-215239.jpg

Mickey Mouse Clubhouse Cake

For my sons 5th birthday party he wanted a Mickey Mouse Clubhouse birthday party. He insisted on having a Clubhouse cake something I wasn’t sure I would be able to pull off but I was willing to give it a try. I learned a few lessons like a head made out of cake is heavier than you would think and it needs a lot of support. You can actually see from the pictures how the head began to sink. If I ever made another one I would build in a platform for the head to sit on. To make the cake I used a ball cake set made by Wilton for the head and I used a metal bowl for the body. The ears and the foot wrote made from fruity pebbles rice crispy treats that were molded by hand and covered in fondant. Even with my mistakes the cake was great. Everyone was impressed with the effort and my son LOVED it! It looked enough like Mickeys Clubhouse to impress him and that’s all that matters.

20130916-201535.jpg

20130916-201652.jpg

20130916-201725.jpg

Peanut Party for Our Little Peanut

For my babies first birthday we thought what better way to celebrate our little peanut than with a Circus Peanut Party?! We had so much fun!

The menu was circus of course. We had popcorn and peanuts for snacks as guests arrived along with apples (I like to throw in a little healthy fruit or veggie option). The main meal was hot dogs, nachos and chili which was great because everything overlapped and went really well together. The adults and the kids were all happy with the meal choices. Dessert was cupcakes topped with circus peanuts and brownies dressed up with frosting and rainbow sprinkles. Circus peanuts were also set out with dessert along with little favor bags that said “Happiness is a Peanut” filled with circus peanuts.

For every party I like to add at least one hand made project. This time it was a circus tent made from hula hoops and almost 20 yards of fabric. It turned out so cute. We had a costume area with wigs and ties and clown noses and face paint.

Despite some gloomy morning weather the clouds cleared and the sun came out just in time. We all had a ball clowning around on Drew’s first birthday!

20130916-200709.jpg

20130916-200729.jpg

20130916-200757.jpg

20130916-200858.jpg

20130916-200922.jpg

20130916-201002.jpg

20130916-201026.jpg

20130916-201055.jpg

20130916-201107.jpg

20130916-201131.jpg

Heirloom Christmas Cookie Platter

This weekend I took my boys to a ceramics studio and we made this adorable cookie platter using the two older boys hands as reindeer and the babies foot as a Christmas tree. I can’t wait to see it after its been fired. If its even half as cute as it is now it will be a family heirloom for years to come. To manage my brood I had some help from my husband who rushed the two little ones in and out. My oldest stayed with me while I put the details on and made a few Christmas gifts he can give to his grandparents and other friends and family members.

20121216-103501.jpg

Santa and Elves handprint ornament

These turned out so cute. To make these I painted my sons palm white for snow. I painted four of his fingers green for elves and one finger red for Santa. To make the Santa finger just a little bit taller than the elves I started painting the face above the finger tip while the elves faces I painted on the fingers. I used a soy based acrylic paint. I just love these and I can’t wait to share them as Christmas gifts for friends and family.

20121215-005411.jpg

20121215-005423.jpg

20121215-005436.jpg

20121215-005450.jpg

20121215-005506.jpg

20121215-005517.jpg